Shiny for Python
Overview
Teaching: 60 min
Exercises: 0 minQuestions
Create highly interactive visualizations, realtime dashboards, data explorers, model demos, all in pure Python
Objectives
First learning objective. (FIXME)
Introduction
Shiny is a software package for building interactive web applications. Originally created for the R language, it has been now expanded to support Python Language. We will focus here on Shiny for Python. Most of the internals of Shiny are shared between the two implementations.
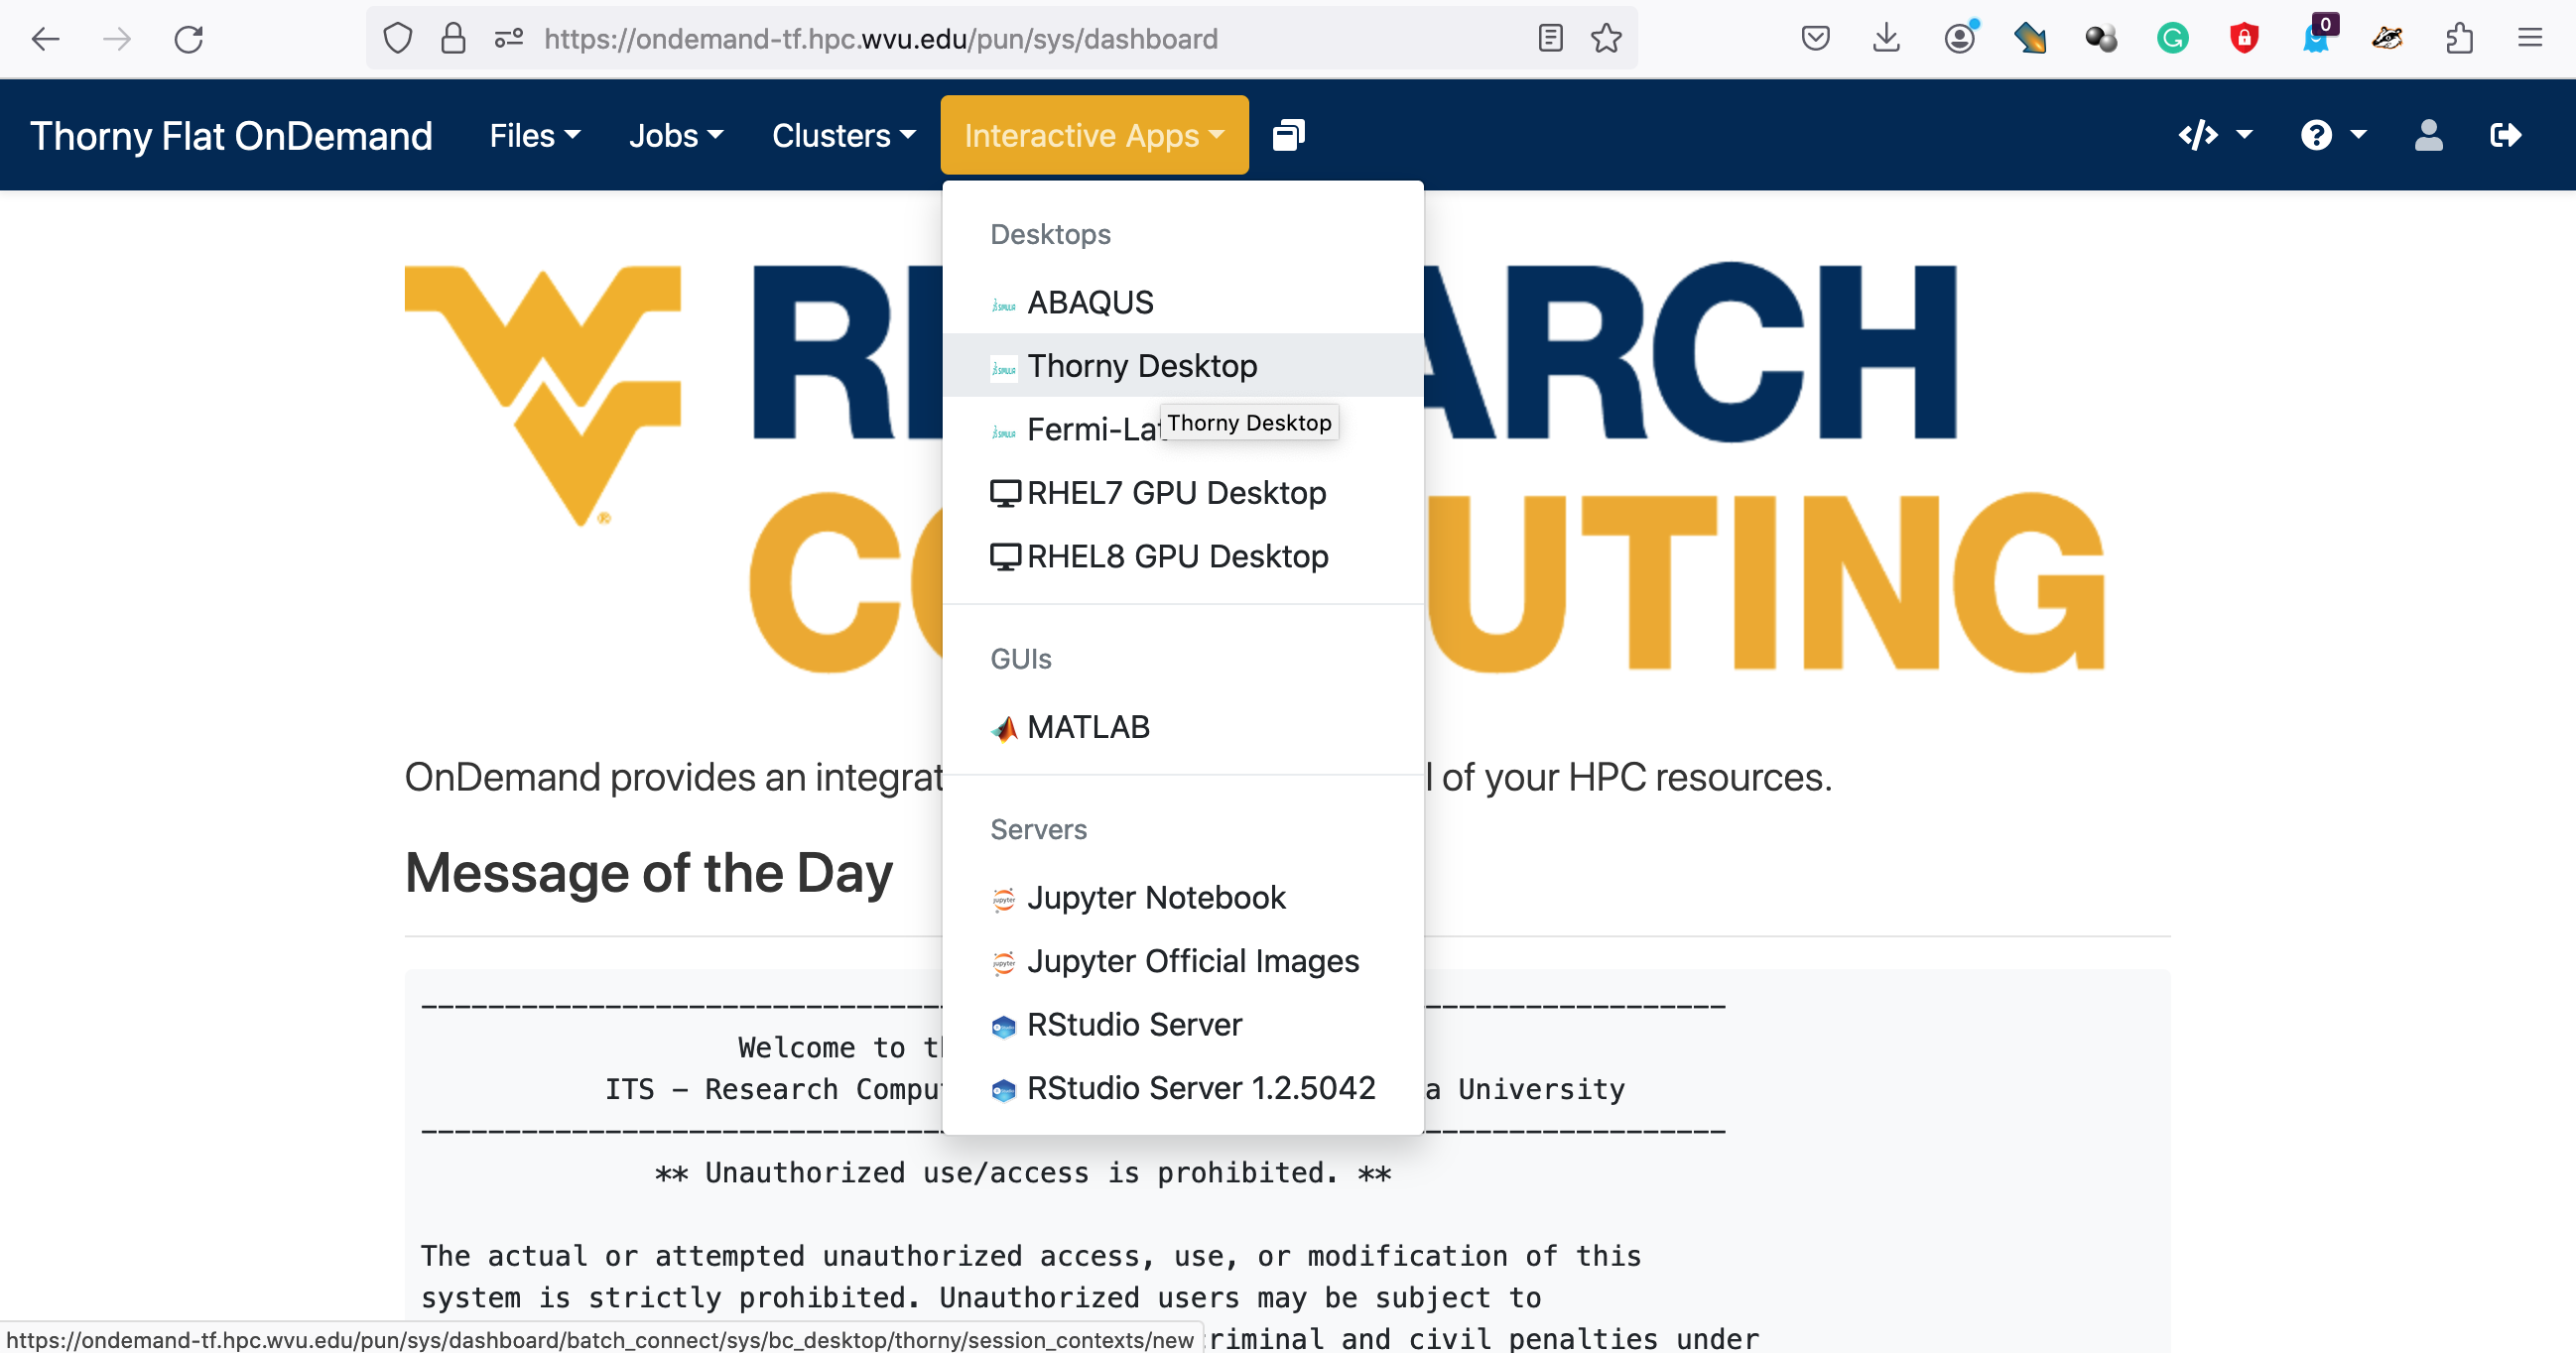
We start our exploration of shiny creating a virtual desktop on Thorny Flat using Open On-demand. Goto to Open On-Demand portal for Thorny Flat. Enter your credentials. From the dashboard select “Interactive Apps” and “Thorny Desktop”
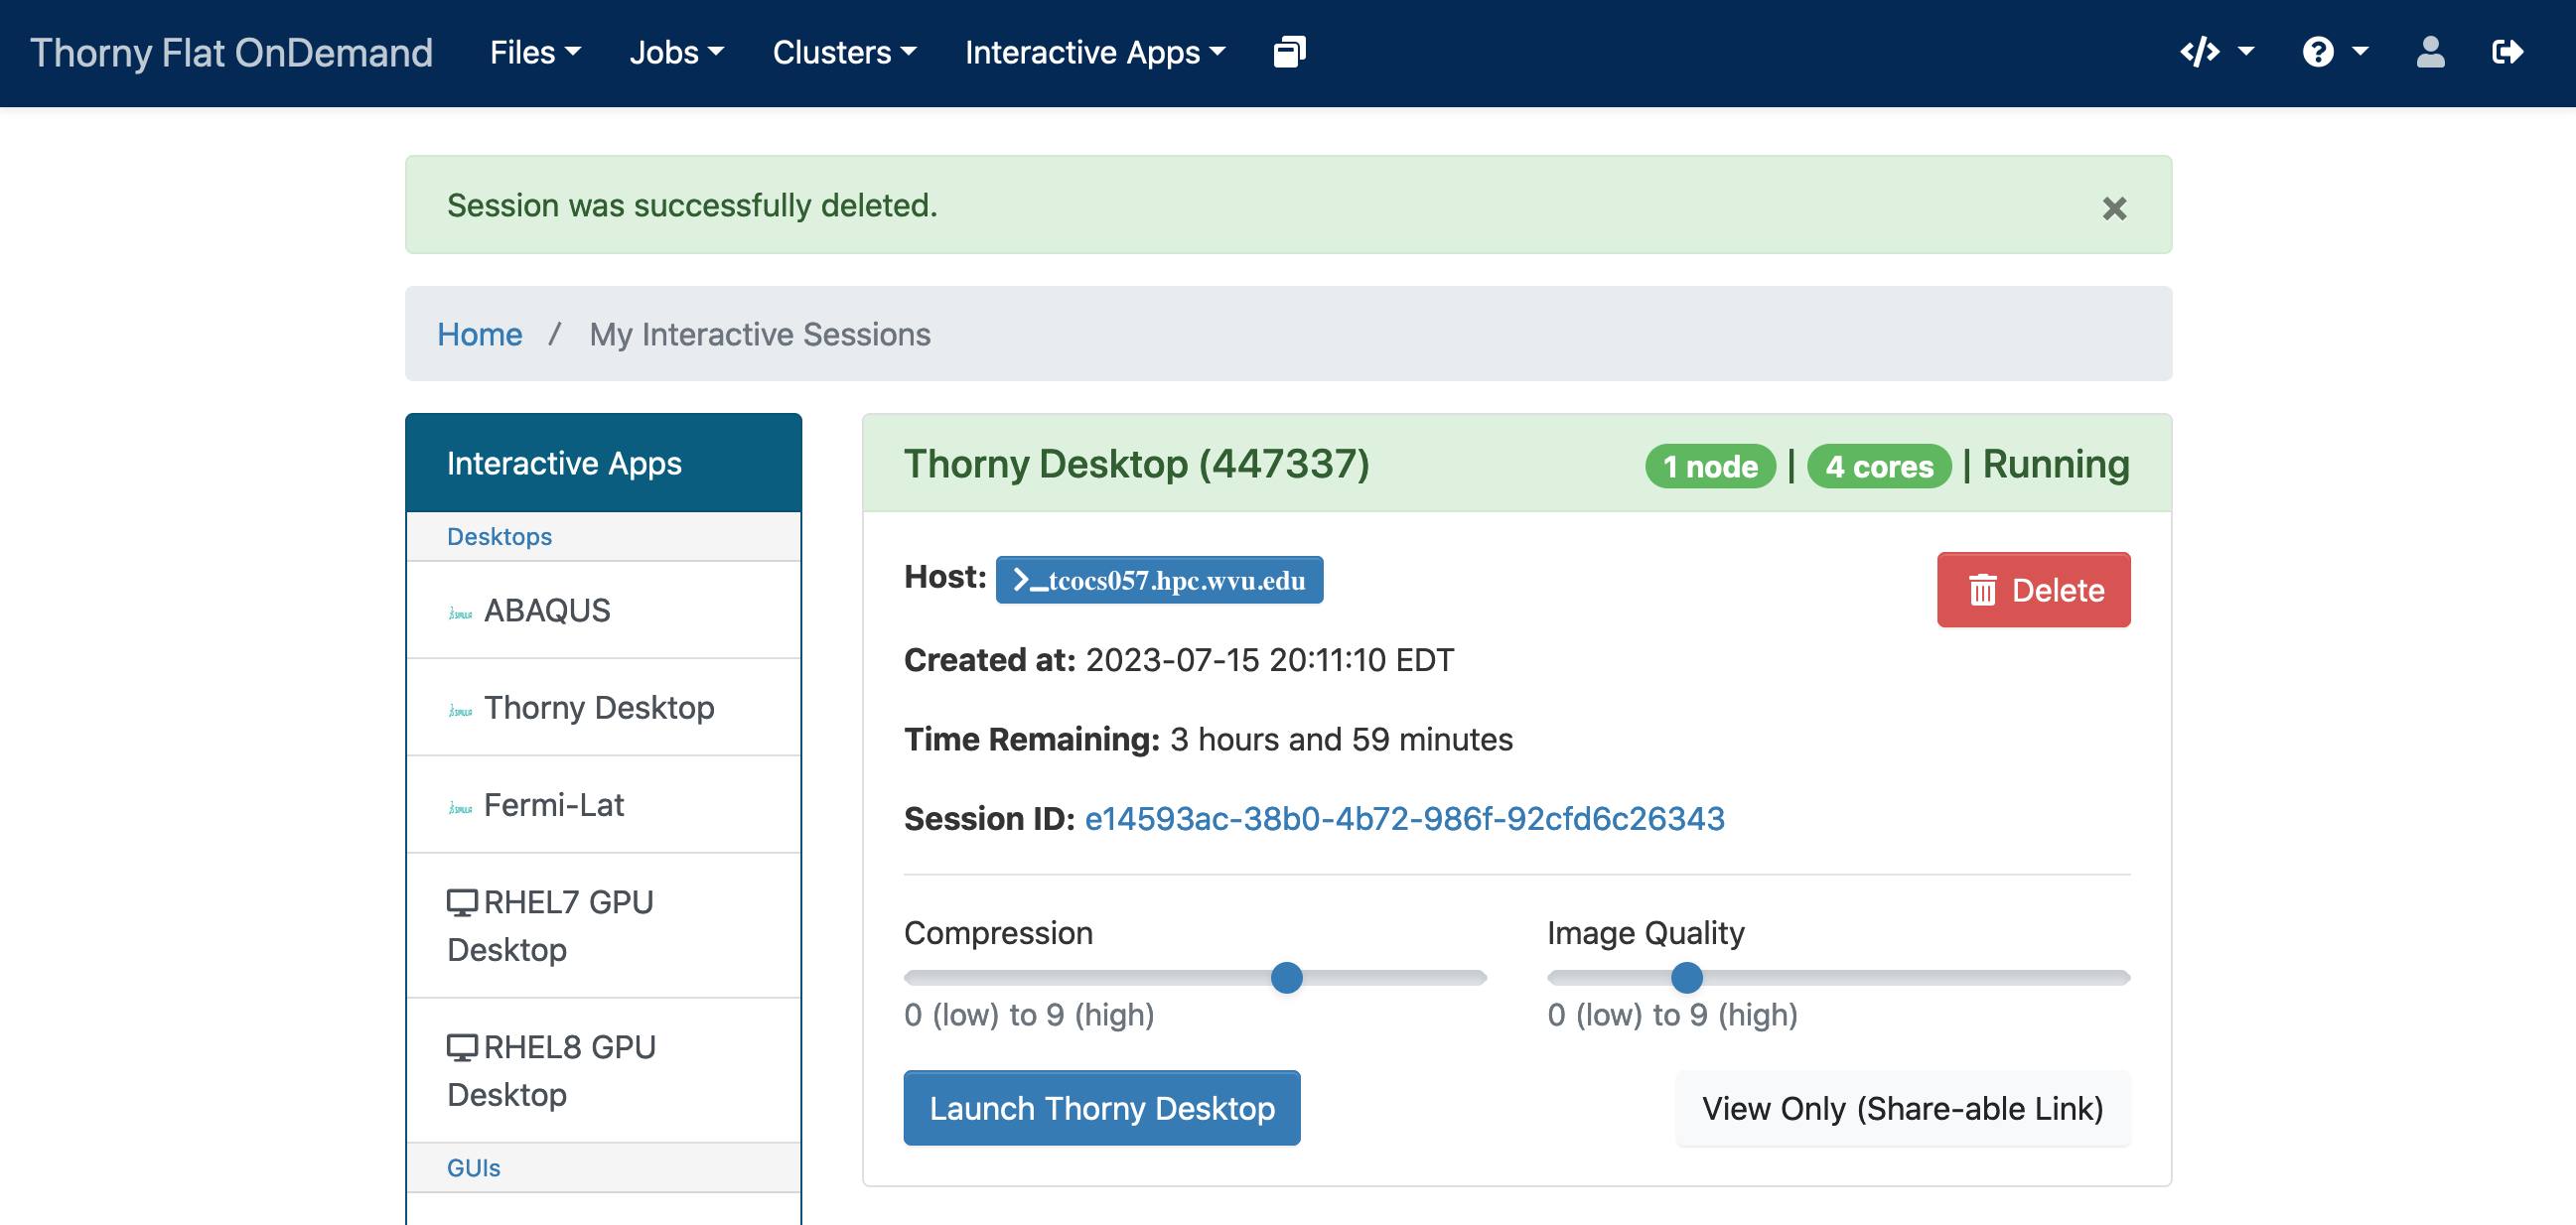
Select minimal requests such as “standby” for partition, 4 hours walltime, 4 CPU cores. A new job will be created
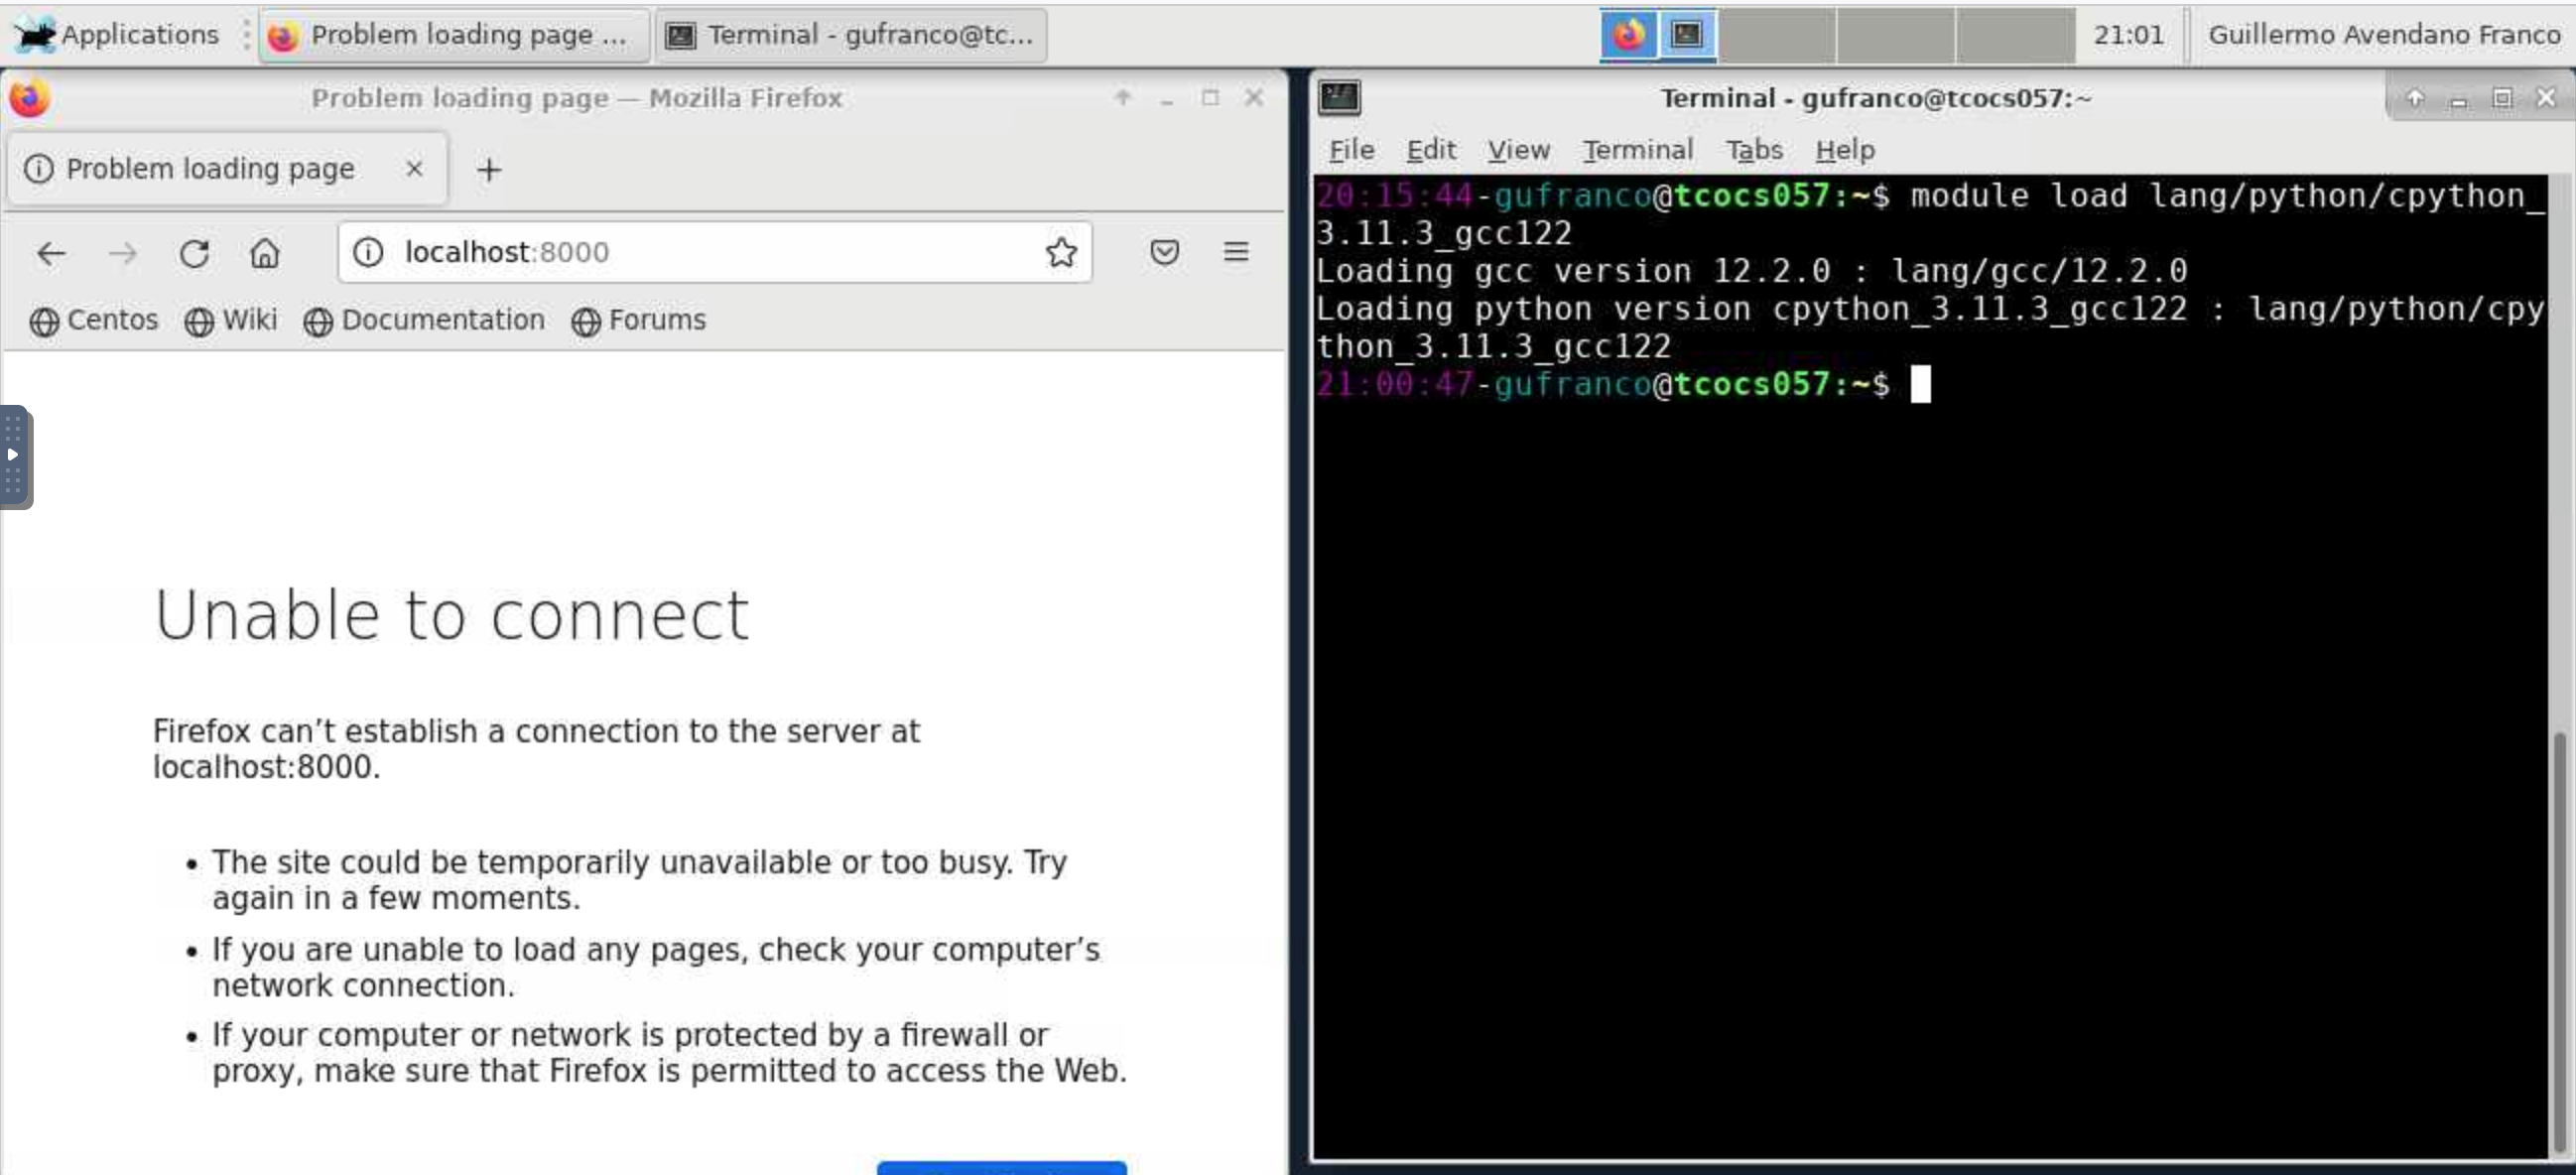
Click on “Launch Thorny Desktop” and open 2 windows, a terminal, and a web browser.
Load the module for Python on the terminal
$> module load lang/python/cpython_3.11.3_gcc122
Now we are ready to create our first shiny app.
Create a folder for our shiny apps. Lets call it SHINY and inside create a folder app1
$> mkdir -p SHINY/app1
$> cd SHINY/app1
Now we can create a simple example app with the command::
$> shiny create .
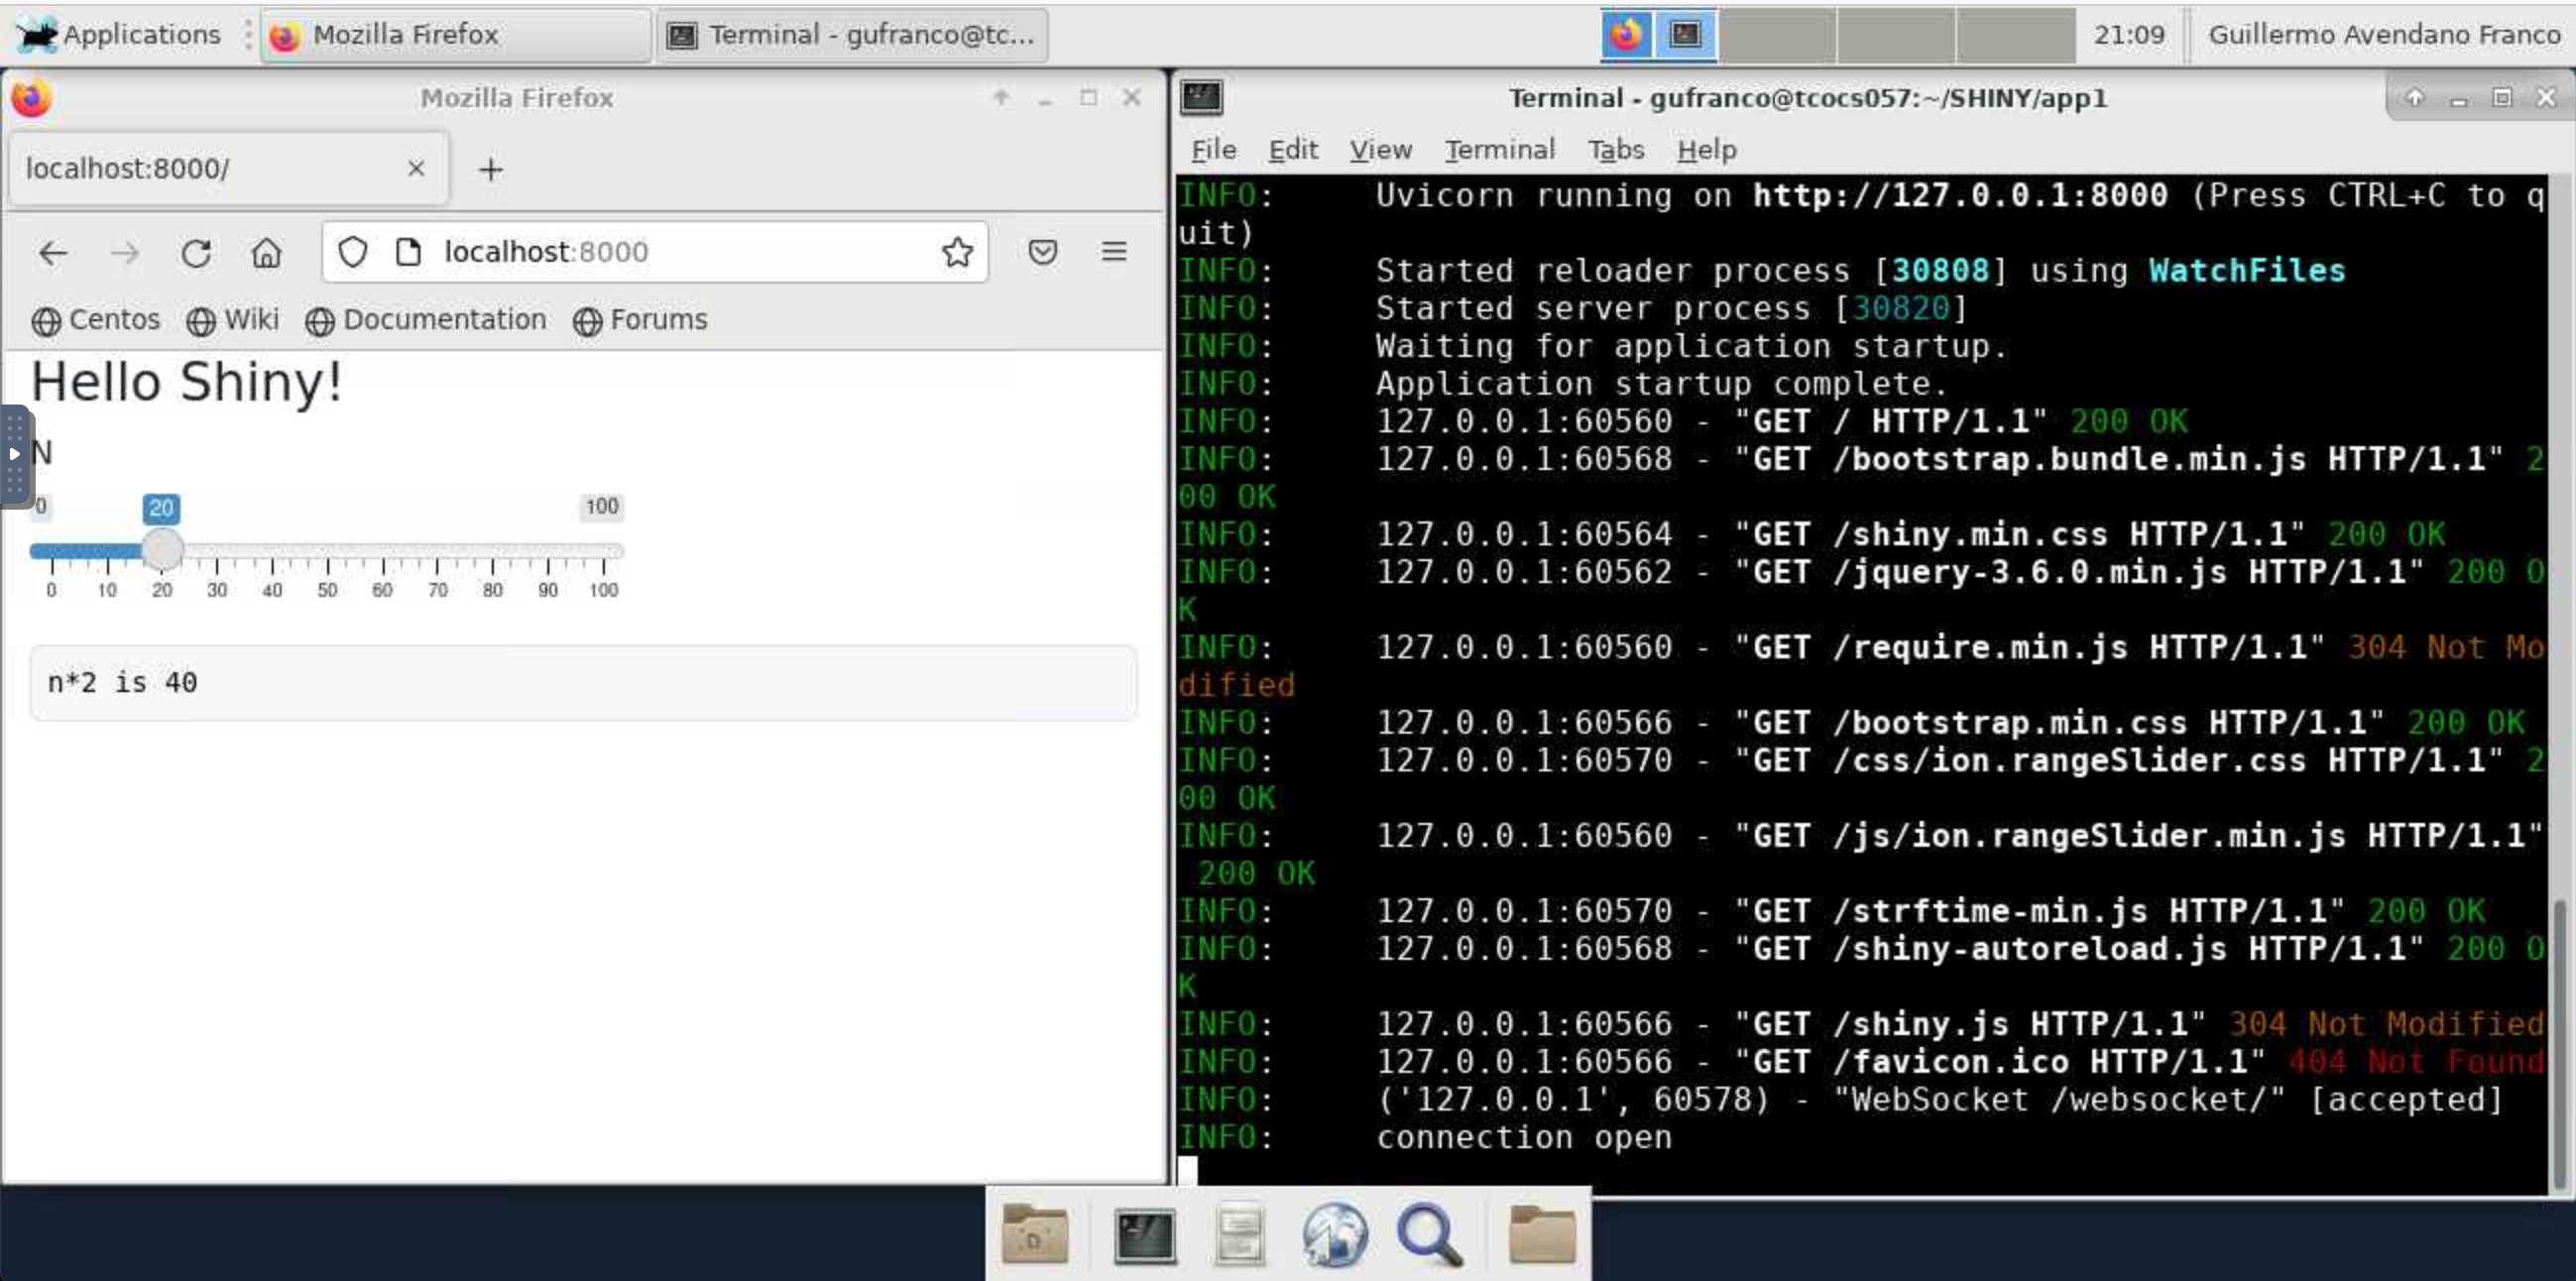
Run the first app with:
$> shiny run --reload
On the web browser go to https://localhost:8000 to visualize the app
When we execute shiny create . a python file called app.py is created.
This file is as follows:
from shiny import App, render, ui

app_ui = ui.page_fluid(
  ui.h2("Hello Shiny!"),
  ui.input_slider("n", "N", 0, 100, 20),
  ui.output_text_verbatim("txt"),
)

def server(input, output, session):
  @output
  @render.text
  def txt():
      return f"n*2 is {input.n() * 2}"

app = App(app_ui, server)
This file contains the main ingredients of a shiny app. Shiny applications consist of two parts: the user interface (or UI), and the server function. These are combined using a shiny.App object.
Adding UI inputs and outputs
Note the two UI pieces added:
input_slider()creates a slider.output_text_verbatim()creates a field to display dynamically generated text.
These elements have been added to the app_ui()
We can now copy this app and start adding modifications to it to construct our second app.
Cancel the execution of the first app executing ^C, move one folder up, and copy the folder under a new name.
$> cd ..
$> cp -r app1 app2
$> cd app2
Change the file app.py inside app2 as follows:
from shiny import App, render, ui

app_ui = ui.page_fluid(
    ui.h2("Sum Shiny!"),
    ui.input_slider("a", "A", 0, 100, 20),
    ui.input_slider("b", "B", 0, 100, 20),
    ui.output_text_verbatim("txt"),
)

def server(input, output, session):
    @output
    @render.text
    def txt():
        return f"a+b is {input.a() + input.b()}"

app = App(app_ui, server)
Now we have two sliders and one verbatim text. These elements are created as part of the app_ui() function.
The UI part defines what visitors will see on their web page. The dynamic parts of our app happen inside the server function.
Inside the server function, we define an output function named txt. This output function provides the content for the output_text_verbatim(“txt”) in the UI.
Note that inside the server function, we do the following:
- define a function named
txt, whose output shows up in the UI’s output_text_verbatim(“txt”). - decorate it with
@render.text, to say the result is text (and not, e.g., an image). - decorate it with
@output, to say the result should be displayed on the web page.
Finally, notice our txt() function takes the value of our sliders a and b, and returns its sum computed inside the txt function. To access the value of the sliders, we use input.a() and input.b(). Notice that these are callable objects (like a function) that must be invoked to get the value.
Reactivity
This reactive flow of data from UI inputs to server code, and back out to UI outputs is central to how Shiny works.
When you moved the sliders in the app, a series of actions were kicked off, resulting in the output on the screen changes. This is called reactivity.
Inputs, like our sliders a and b, are reactive values: when they change, they automatically cause any of the reactive functions that use them (like txt()) to recalculate.
Layouts
So far, our UI has consisted of two inputs and one output. Shiny also has layout components that can contain other components and visually arrange them. Examples of these are sidebar layouts, tab navigation, and cards.
For our next example, we’ll use a common layout strategy for simple Shiny apps. We will have input controls in a narrow sidebar on the left and a plot on the right.
In the following code, we use the function ui.layout_sidebar() to separate the page into two panels. This function takes two arguments: a ui.panel_sidebar and a ui.panel_main, which each can contain whatever components you want to display on the left and right, respectively.
import matplotlib.pyplot as plt
import numpy as np
from shiny import ui, render, App

# Create some random data
t = np.linspace(0, 2 * np.pi, 1024)
data2d = np.sin(t)[:, np.newaxis] * np.cos(t)[np.newaxis, :]

app_ui = ui.page_fixed(
    ui.h2("Playing with colormaps"),
    ui.markdown("""
	This app is based on a [Matplotlib example][0] that displays 2D data
	with a user-adjustable colormap. We use a range slider to set the data
	range that is covered by the colormap.

	[0]: https://matplotlib.org/3.5.3/gallery/userdemo/colormap_interactive_adjustment.html
    """),
    ui.layout_sidebar(
	ui.panel_sidebar(
	    ui.input_radio_buttons("cmap", "Colormap type",
		dict(viridis="Perceptual", gist_heat="Sequential", RdYlBu="Diverging")
	    ),
	    ui.input_slider("range", "Color range", -1, 1, value=(-1, 1), step=0.05),
	),
	ui.panel_main(
	    ui.output_plot("plot")
	)
    )
)

def server(input, output, session):
    @output
    @render.plot
    def plot():
	fig, ax = plt.subplots()
	im = ax.imshow(data2d, cmap=input.cmap(), vmin=input.range()[0], vmax=input.range()[1])
	fig.colorbar(im, ax=ax)
	return fig


app = App(app_ui, server)
Notice how Shiny uses nested function calls to indicate parent/child relationships. In this example, ui.input_radio_buttons() is inside of ui.panel_sidebar(), and ui.panel_sidebar() is in ui.layout_sidebar(), and so on.
app_ui = ui.page_fixed(
  ui.h2(...),
  ui.markdown(...),
  ui.layout_sidebar(
    ui.panel_sidebar(
      ui.input_radio_buttons(...),
      ui.input_slider(...),
      ),
    ui.panel_main(
      ui.output_plot(...)
    )
  )
)
This example also includes a title and some explanatory text written in a Markdown string literal, and uses the ui.markdown() function to render it to HTML.
UI elements for inputs
Now we will explore in more detail the creation of UI elements separated from the server logic.
Each input control on a page is created by calling a Python function. All such functions take the same first two string arguments:
id: an identifier used to refer to input’s value in the server code. For example, id=”x1” corresponds with input.x1() in the server function. id values must be unique across all input and output objects on a page, and should follow Python variable/function naming rules (lowercase with underscores, alphanumeric characters allowed, cannot start with a number).label: a description for the input that will appear next to it. Can usually be None if no label is desired.
Note that many inputs take additional arguments. Lets see some of the UI elements from our previous apps:
  ui.input_slider("a", "A", 0, 100, 20),

  ui.input_slider("b", "B", 0, 100, 20),

  ui.input_radio_buttons("cmap", "Colormap type",
		  dict(viridis="Perceptual", gist_heat="Sequential", RdYlBu="Diverging"))

  ui.input_slider("range", "Color range",
    -1, 1, value=(-1, 1), step=0.05),
So far we have only use input_slider and , input_radio_buttons, but there are many other UI elements. We’ll show some common input objects.
Number inputs
ui.input_numeric creates a text box where a number (integer or real) can be entered, plus up/down buttons. This is most useful when you want the user to be able to enter an exact value.
ui.input_slider creates a slider. Compared to a numeric input, a slider makes it easier to scrub back and forth between values, so it may be more appropriate when the user does not have an exact value in mind to start with. You can also provide more restrictions on the possible values, as the min, max, and step size are all strictly enforced.
ui.input_slider can also be used to select a range of values. To do so, pass a tuple of two numbers as the value argument instead of a single number.
Example (4.Number_Inputs/app.py):
from shiny import ui, App

app_ui = ui.page_fluid(
    ui.input_numeric("x1", "Number", value=10),
    ui.input_slider("x2", "Slider", value=10, min=0, max=20),
    ui.input_slider("x3", "Range slider", value=(6, 14), min=0, max=20)
)

app = App(app_ui, None)
Text inputs
Shiny includes three inputs for inputting string values.
ui.input_text This is a simple textfield. Use it for shorter, single-line values.
ui.input_text_area displays multiple lines, soft-wraps the text, and lets the user include line breaks, so is more appropriate for longer runs of text or multiple paragraphs.
ui.input_password is for passwords and other values that should not be displayed in the clear. (Note that Shiny does not apply any encryption to the password, so if your app involves passing sensitive information, make sure your deployed app uses https, not http, connections.)
Example (5.Text_Inputs/app.py):
from shiny import ui, App

app_ui = ui.page_fluid(
    ui.input_text("x1", "Text", placeholder="Enter text"),
    ui.input_text_area("x2", "Text area", placeholder="Enter text"),
    ui.input_password ("x3", "Password", placeholder="Enter password"),
)

app = App(app_ui, None)
Selection inputs
There are two options for single and multiple selection from a list of values
ui.input_selectize and ui.input_select
You can choose whether the user can select multiple values or not, using the multiple argument.
ui.input_selectize uses the Selectize JavaScript library.
ui.input_select inserts a standard HTML <select> tag.
ui.input_radio_buttons and ui.input_checkbox_group are useful for cases where you want the choices to always be displayed. Radio buttons force the user to choose one and only one option, while checkbox groups allow zero, one, or multiple choices to be selected.
Example (6.Selection_inputs/app.py):
from shiny import ui, App

choices = ["Tetrahedron", "Cube", "Octahedron", "Dodecahedron", "Icosahedron"]

app_ui = ui.page_fluid(
    ui.h2("Platonic Solids"),
    ui.input_selectize("x1", "Selectize (single)", choices),
    ui.input_selectize("x2", "Selectize (multiple)", choices, multiple = True),
    ui.input_select("x3", "Select (single)", choices),
    ui.input_select("x4", "Select (multiple)", choices, multiple = True),
    ui.input_radio_buttons("x5", "Radio buttons", choices),
    ui.input_checkbox_group("x6", "Checkbox group", choices),
)

app = App(app_ui, None)
Toggle inputs
Toggles allow the user to specify whether something is true/false (or on/off, enabled/disabled, included/excluded, etc.).
ui.input_checkbox shows a simple checkbox, while ui.input_switch shows a toggle switch. These are functionally identical, but by convention, checkboxes should be used when part of a form that has a Submit or Continue button, while toggle switches should be used when they take immediate effect.
Example (7.Toggle_inputs/app.py)
from shiny import ui, App

app_ui = ui.page_fluid(
    ui.input_checkbox("x1", "Checkbox"),
    ui.input_switch("x2", "Switch")
)

app = App(app_ui, None)
Date inputs
There are two inputs for dates:
ui.input_datelets the user specify a date, either interactively or by typing it in.ui.input_date_rangeis similar, but for cases where a start and end date are needed.
Example (8.Date_inputs/app.py):
from shiny import ui, App

app_ui = ui.page_fluid(
    ui.input_date("x1", "Date input"),
    ui.input_date_range("x2", "Date range input"),
)

app = App(app_ui, None)
Action inputs
ui.input_action_button and ui.input_action_link let the user invoke specific actions on the server side.
Use ui.input_action_button for actions that feels effectual: recalculating, fetching new data, applying settings, etc. Add class_=”btn-primary” to highlight important actions (like Submit or Continue), and class_=”btn-danger” to highlight dangerous actions (like Delete).
Use ui.input_action_link for actions that feel more like navigation, like exposing a new UI panel, navigating through paginated results, or bringing up a modal dialog.
Example (9.Action_inputs/app.py):
from shiny import ui, App

app_ui = ui.page_fluid(
    ui.p(ui.input_action_button("x1", "Action button")),
    ui.p(ui.input_action_button("x2", "Action button (Primary)", class_="btn-primary")),
    ui.p(ui.input_action_button("x3", "Action button (Danger)", class_="btn-danger")),
    ui.p(ui.input_action_link("x4", "Action link")),
)

app = App(app_ui, None)
UI elements for outputs
Outputs create a spot on the webpage to put results from the server.
At a minimum, all UI outputs require an id argument, which corresponds to the server’s output ID.
For example if you create this UI output:
ui.output_text("my_func")
You need a decorated function my_func on the server side. Something like:
def server(input, output, session):
    @output
    @render.text
    def my_func():
        return "The result of simulation is ..."
Notice that the name of the function my_func() matches the output ID; this is how Shiny knows how to connect each of the UI’s outputs with its corresponding logic in the server.
Notice also the relationship between the names ui.output_text() and the decorator @render.text. Shiny outputs generally follow this pattern of ui.output_XXX() for the UI and @render.XXX to decorate the output logic.
There are two kinds of renderings. Static and Interactive. With Static outputs you will not react to user interaction while for interactive outputs, the user can trigger reactions on the element.
Static plot output
Render static plots based on Matplotlib with ui.output_plot() and @render.plot. Plotting libraries built on Matplotlib, like seaborn and plotnine are also supported.
The function that @render.plot decorates typically returns a Matplotlib Figure or plotnine ggplot object, but @render.plot does support other less common return types, and also supports plots generated through side-effects.
Example (10.Static_plot/app.py):
import numpy as np
from shiny import ui, render, App
from matplotlib import pyplot as plt

app_ui = ui.page_fluid(
        ui.h2("Random points on scatter plot"),
        ui.input_slider("n", "Number of Points", value=50, min=10, max=100, step=10),
        ui.output_plot("a_scatter_plot"),
)

def server(input, output, session):
        @output
        @render.plot
        def a_scatter_plot():
                x = np.random.rand(input.n())
                y = np.random.rand(input.n())
                return plt.scatter(x,y)

app = App(app_ui, server)
Simple table output
Render various kinds of data frames into an HTML table with ui.output_table() and @render.table.
The function that @render.table decorates typically returns a pandas.DataFrame, but object(s) that can be coerced to a pandas.DataFrame via an obj.to_pandas() method are also supported (this includes Polars data frames and Arrow tables).
Example (11.Table_outpu/app.py):
from pathlib import Path
import pandas as pd
from shiny import ui, render, App

df = pd.read_csv(Path(__file__).parent / "iris.csv")

app_ui = ui.page_fluid(
    ui.h2("Iris Dataset"),
    ui.output_table("iris_dataset"),
)

def server(input, output, session):
    @output
    @render.table
    def iris_dataset():
        return df

app = App(app_ui, server)
This example requires the packages pandas for converting the CSV file into a pandas dataframe and jinja2 displaying the table.
Interactive plots
Shiny supports interactive plotting libraries such as plotly. Here’s a basic example using plotly:
from shiny import ui, App
from shinywidgets import output_widget, render_widget
import plotly.express as px
import plotly.graph_objs as go

df = px.data.iris()

app_ui = ui.page_fluid(
    ui.h2("Iris Dataset"),
    ui.div(
        ui.input_select(
            "x", label="Variable",
            choices=['sepal_length', 'sepal_width', 'petal_length', 'petal_width']
        ),
        ui.input_select(
            "color", label="Color",
            choices=["species"]
        ),
        class_="d-flex gap-3"
    ),
    output_widget("my_widget")
)

def server(input, output, session):
    @output
    @render_widget
    def my_widget():
        fig = px.histogram(
            df, x=input.x(), color=input.color(),
            marginal="rug"
        )
        fig.layout.height = 275
        return fig

app = App(app_ui, server)
For running this example we need the packages plotly and shinywidgets.
Interactive maps
Shiny supports interactive mapping libraries such as ipyleaflet, pydeck, and more. Here’s a basic example using ipyleaflet with a few basemaps:
Example (13.Interactive_maps/app.py):
from shiny import *
from shinywidgets import output_widget, render_widget
import ipyleaflet as L

basemaps = {
  "OpenStreetMap": L.basemaps.OpenStreetMap.Mapnik,
  "Stamen.Toner": L.basemaps.Stamen.Toner,
  "Stamen.Terrain": L.basemaps.Stamen.Terrain,
  "Stamen.Watercolor": L.basemaps.Stamen.Watercolor,
  "Esri.WorldImagery": L.basemaps.Esri.WorldImagery,
  "Esri.NatGeoWorldMap": L.basemaps.Esri.NatGeoWorldMap,
}

app_ui = ui.page_fluid(
    ui.h2("West Virginia - Mountaineer Country"),
    ui.input_select(
        "basemap", "Choose a basemap",
        choices=list(basemaps.keys())
    ),
    output_widget("map")
)

def server(input, output, session):
    @output
    @render_widget
    def map():
        basemap = basemaps[input.basemap()]
        return L.Map(basemap=basemap, center=[39.6, -79.9], zoom=10)

app = App(app_ui, server)
Text output
Use ui.output_text() and the correspoding decorators @render.text to render a block of text.
Your server logic should return a Python string. No HTML markup or Markdown can be used, the text will be displayed without processing.
Example (14.Text_output/app.py`):
from shiny import ui, render, App

app_ui = ui.page_fluid(
    ui.output_text("my_cool_text")
)

def server(input, output, session):
    @output
    @render.text
    def my_cool_text():
        return "hello, world!"

app = App(app_ui, server)
There is also the variant ui.output_text_verbatim with the same decorator @render.text.
This is similar to text output, but renders text in a monospace font, and respects newlines and multiple spaces (unlike ui.output_text(), which collapses all whitespace into a single space, in accordance with HTML’s normal whitespace rule).
Example (15.Text_verbatim_output/app.py):
from shiny import ui, render, App
import scipy.special

app_ui = ui.page_fluid(
    ui.output_text_verbatim("a_code_block"),
    # The p-3 CSS class is used to add padding on all sides of the page
    class_="p-3"
)

def server(input, output, session):
    @output
    @render.text
    def a_code_block():
        # This function should return a string
        return scipy.special.__doc__

app = App(app_ui, server)
HTML and UI output
ui.output_ui() and decorator @render.ui are used to render HTML and UI from the server.
You’ll need to use output_ui if you want to render HTML/UI dynamically–that is, if you want the HTML to change as inputs and other reactives change.
Example (16.HTML_UI_output/app.py):
from shiny import ui, render, App

app_ui = ui.page_fluid(
    ui.input_text("message", "Message", value="Hello, world!"),
    ui.input_checkbox_group("styles", "Styles", choices=["Bold", "Italic"]),
    ui.input_selectize("size", "HTML font size", choices=["H1", "H2", "H3", "H4"]),
    # The class_ argument is used to enlarge and center the text
    ui.output_ui("some_html", class_="display-3 text-center")
)

def server(input, output, session):
    @output
    @render.ui
    def some_html():
        x = input.message()
        if "Bold" in input.styles():
            x = ui.strong(x)
        if "Italic" in input.styles():
            x = ui.em(x)
        if "H1" in input.size():
            x = ui.h1(x)
        if "H2" in input.size():
            x = ui.h2(x)
        if "H3" in input.size():
            x = ui.h3(x)
        if "H4" in input.size():
            x = ui.h4(x)
        return x

app = App(app_ui, server)
The function under the decorator @render.ui can return any of the following:
- A plain string (which will be rendered as plain text, even if it contains HTML markup)
- Any HTML tag object (like
ui.tags.div()) - Any Shiny UI object, including layouts, inputs, and outputs
Server logic
In Shiny, the server logic is defined within a function which takes three arguments: input, output, and session. It looks something like this:
def server(input, output, session):
    # Server code goes here
    ...
All of the server logic we’ll discuss, such as using inputs and define outputs, happens within the server function.
Each time a user connects to the app, the server function executes once — it does not re-execute each time someone moves a slider or clicks on a checkbox. So how do updates happen? When the server function executes, it creates a number of reactive objects that persist as long as the user stays connected — in other words, as long is their session is active. These reactive objects are containers for functions that automatically re-execute in response to changes in inputs.
Defining outputs
To define the logic for an output, create a function with no parameters whose name matches a corresponding output ID in the UI. Then apply a render decorator and the @output decorator.
As the function is inside the server and the server has input and output objects, these objects are visible inside the server.
However, input values can not be read at the top level of the server function. If you try to do that, you’ll get an error that says RuntimeError: No current reactive context. The input values are reactive and, as the error suggests, are only accessible within reactive code.
Consider this example (``17.server_logic/app.py`):
from shiny import App, render, ui

app_ui = ui.page_fluid(
    ui.input_checkbox("enable", "Enable?"),
    ui.h3("Is it enabled?"),
    ui.output_text_verbatim("txt"),
)

def server(input, output, session):
    @output
    @render.text
    def txt():
        if input.enable():
            return "Yes!"
        else:
            return "No!"

app = App(app_ui, server)
When you define an output function, Shiny makes it reactive, and so it can be used to access input values.
Key Points
First key point. Brief Answer to questions. (FIXME)


